


Page 52 - Demo
P. 52
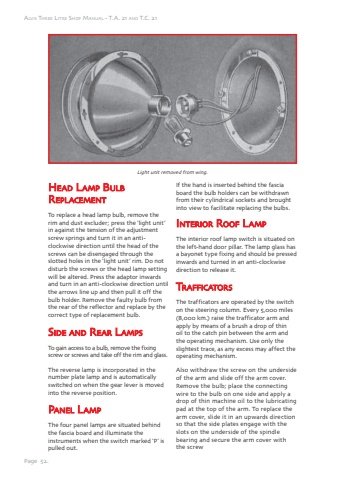
Page 52.Alvis Three Litre Shop Manual - T.A. 21 and T.C. 21HHeaad LLamp amp Buulbb RRepplacacemmenttTo replace a head lamp bulb, remove the rim and dust excluder; press the %u2018light unit%u2019 in against the tension of the adjustment screw springs and turn it in an anticlockwise direction until the head of the screws can be disengaged through the slotted holes in the %u2018light unit%u2019 rim. Do not disturb the screws or the head lamp setting will be altered. Press the adaptor inwards and turn in an anti-clockwise direction until the arrows line up and then pull it off the bulb holder. Remove the faulty bulb from the rear of the reflector and replace by the correct type of replacement bulb.SSiide aand RReaar LLamp ampsTo gain access to a bulb, remove the fixing screw or screws and take off the rim and glass.The reverse lamp is incorporated in the number plate lamp and is automatically switched on when the gear lever is moved into the reverse position.Paanel LLamp ampThe four panel lamps are situated behind the fascia board and illuminate the instruments when the switch marked %u2018P%u2019 is pulled out.If the hand is inserted behind the fascia board the bulb holders can be withdrawn from their cylindrical sockets and brought into view to facilitate replacing the bulbs.Intteriior RRooff LLamp ampThe interior roof lamp switch is situated on the left-hand door pillar. The lamp glass has a bayonet type fixing and should be pressed inwards and turned in an anti-clockwise direction to release it.TrafficatorsThe trafficators are operated by the switch on the steering column. Every 5,000 miles (8,000 km.) raise the trafficator arm and apply by means of a brush a drop of thin oil to the catch pin between the arm and the operating mechanism. Use only the slightest trace, as any excess may affect the operating mechanism.Also withdraw the screw on the underside of the arm and slide off the arm cover. Remove the bulb; place the connecting wire to the bulb on one side and apply a drop of thin machine oil to the lubricating pad at the top of the arm. To replace the arm cover, slide it in an upwards direction so that the side plates engage with the slots on the underside of the spindle bearing and secure the arm cover with the screwLight unit removed from wing.


